Back in December, 2012 Microsoft Exchange Product team announced the general availability of Exchange 2013. Along with Exchange 2013, Microsoft also released its 2013 wave of products, including Lync 2013, Office 2013, and last but not least SharePoint 2013. All these products empower end-user productivity by allowing them to work more efficiently and effectively. When we talk about Exchange 2013, it includes numerous brand-new features, which are few of the most awaited features of Exchange and Outlook. You can read more about Exchange 2013 and its features on this blog post from the Exchange Team.
Understanding Exchange Server 2013
It is highly imperative for us to first understand how Exchange 2013 is different from its previous versions, and how Exchange 2013 various components work together to make it possible for us to run a enterprise wide messaging environment. For making it easier for you to understand Exchange 2013 and all its new features, I will share with you video links from the Microsoft TechEd Australia 2012, where Exchange Product Team show-cased Exchange 2013 architectural and new features of Exchange 2013. It is strongly recommended to first go-through these knowledge transferring videos, and then move forward to evaluate Exchange 2013.
- Exchange Server 2013 Architecture Deep Dive
- Exchange Server 2013 High Availability and Site Resilience
- Find more on here
Now let’s go ahead and explore how we can build an Exchange Server 2013 based messaging infrastructure. To better understand Exchange 2013 for its various components and new features, we will have a series of blog post with numerous sub-parts.
We will divide this knowledge sharing blog series into following sub-blog posts:
- Part I: Installing a fresh Exchange Server 2013 Messaging Organization in a Green- Field Environment
- Part II: Managing and Configuring Recipients, Mail Flow, and Exchange RBAC for Delegation of Authority
- Part III: Creating Exchange Certificate and Assigning Services to Certificate
- Part IV: Creating Database Availability Group and Configuring Database Copy
- Part V: Setting up Exchange Server 2013 Public Folders
- Part VI: Discussing new Exchange Server 2013 Compliance, Mobility, and Protection
In this blog post we will discuss the first part of this blog series “Part I: Installing a fresh Exchange Server 2013 Messaging Organization in a Green- Field Environment”, where we will cover the following listed topics:
- Discussing Exchange Server 2013 Hardware, Virtualization, and Software Requirements
- Caution for Performing Active Directory Preparation for Exchange 2013 schema extension
- Installing Exchange Server 2013 Server Roles Step by Step on Windows Server 2012
- Conclusion
Discussing Exchange Server 2013 Hardware, Virtualization and Software and Requirements
Exchange Server 2013 installation requirements are not much different as compare with Exchange Server 2010. In addition to the all the same requirement of Exchange Server 2010 along with few more addition to for Windows Server 2008 and Windows Server 2012 based platform, needed to be made available in-order to install Exchange Server 2013.
Hardware Requirements
For seeing the complete list of hardware requirements for Exchange Server 2013, please visit Exchange Server 2013 Hardware requirements TechNet page.
Virtualization Requirements
Exchange Server 2013 can be virtualized as same as Exchange Server 2010, for seeing the required elements for virtualizing Exchange Server 2013 in our environment, visit Exchange 2013 virtualization requirements TechNet page.
Software Requirements
Exchange Server 2013 can be installed on any of the following operating systems:
- Windows Server 2008 R2
- Windows server 2012
In addition to the above, there are series of software components and operating system role and services required for Exchange Server 2013 installation. For each different type of operating system (Windows Server 2008 R2, Windows Server 2013) for your Exchange Server 2013 installation, you have to installation different operating system features and components.
See the detailed set of operating system requirements for Exchange Server 2013 installation on this TechNet page.
Exchange Server 2013 Software Prerequisites
In this blog post we will be showing steps for installing Exchange Server 2013 on a Windows Server 2012 machine, where we will be keeping both Exchange Server 2013 CAS and Mailbox roles on the same machine. For ensuring that all the required prerequisites are meeting, we will run the below PowerShell CMD-Let for installing all the required features and components on the Exchange 2013 machine.
| Paste the below PowerShell CMD-Let in the Windows Server 2012 PowerShell window and execute for installing the required components: Install-WindowsFeature AS-HTTP-Activation, Desktop-Experience, NET-Framework-45-Features, RPC-over-HTTP-proxy, RSAT-Clustering, RSAT-Clustering-CmdInterface, Web-Mgmt-Console, WAS-Process-Model, Web-Asp-Net45, Web-Basic-Auth, Web-Client-Auth, Web-Digest-Auth, Web-Dir-Browsing, Web-Dyn-Compression, Web-Http-Errors, Web-Http-Logging, Web-Http-Redirect, Web-Http-Tracing, Web-ISAPI-Ext, Web-ISAPI-Filter, Web-Lgcy-Mgmt-Console, Web-Metabase, Web-Mgmt-Console, Web-Mgmt-Service, Web-Net-Ext45, Web-Request-Monitor, Web-Server, Web-Stat-Compression, Web-Static-Content, Web-Windows-Auth, Web-WMI, Windows-Identity-Foundation |
In addition to above required operating system components installation, we also have to install the following set of software requirements on Exchange Server 203 machine:
- Microsoft Unified Communications Managed API 4.0, Core Runtime 64-bit
- Microsoft Office 2010 Filter Pack 64 bit
- Microsoft Office 2010 Filter Pack SP1 64 bit
Caution for Performing Active Directory Preparation for Exchange 2013 Schema Extension
It is strongly recommended for performing the Active Directory schema extension for Exchange 2013 manually, what does it mean that don’t let the setup to extend the schema but it would be much better if you perform the schema extension manually. From a practice stand-point I have seen few cases where, setup extended schema had few issues, and for that we had to gone through the whole process again to extend the schema to fix few database and Exchange 2013 server working related issues.
See more details on Active Directory preparation for Exchange Server 2013.
After completing all the requirements, we can move forward for installing our first Exchange Server 2013 instance.
Installing Exchange Server 2013 Server Roles Step by Step on Windows Server 2012
If you remember, in the Exchange 2010 days, we are advised to first install the Client Access Server (CAS) into the legacy Exchange organization, but now with Exchange 2013, the preferred order has changed and we should first install Exchange 2013 Mailbox server in the legacy Exchange organization. Why this has changed? Because now Client Access Server (CAS) is only holding the sub-set part of the processing of the client connection, and majority of the server side tasks happens on the back-side Mailbox Server Role.
For installing Exchange 2013 Mailbox Server Role, follow the below outlined steps in order:
Login to your Windows Server 2012 Mailbox Server, and execute Setup.EXE either from the Command-Prompt or you can also execute the GUI utility from the file-explorer.
- a. Login to your Windows Server 2012 Mailbox Server, and execute Setup.EXE either from the Command-Prompt or you can also execute the GUI utility from the file-explorer.
- b. Check for updates, you can either connect your server for checking the updates, of we can leave it for later time.
- c. The next screen will provide useful information about the following:
- a. Read about Microsoft Exchange Server 2013
- b. Read about supported languages
- c. Use the Exchange server 2013 Deployment Assistant
- d. Accept the license agreement, as you don’t have any other way to proceed without accepting this. :)
- e. Choose your option regarding providing the feedback to Microsoft.
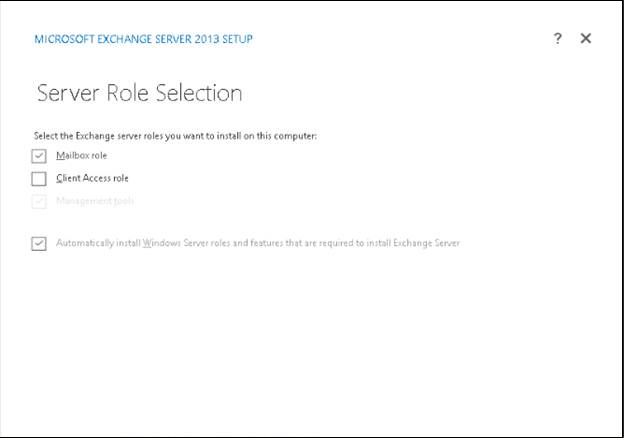
- Server Role Selection window, on this screen we will select the Mailbox role, and will also check the box for saying “Automatically install Windows Server role and features that are required to install Exchange Server”.
- a. Specify the application drive, where you would like to install the Exchange binaries.
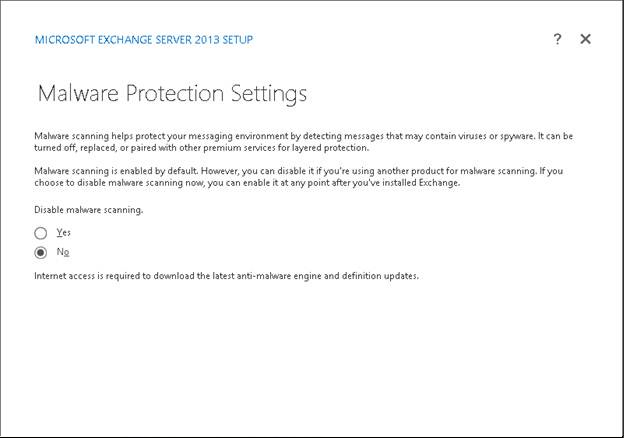
- b. Malware protection settings, Exchange 2013 includes a brand-new enhanced feature for malware protection, by default this feature is enabled on Exchange Mailbox Servers, but if you want you can also disable it.
- a. Readiness check will evaluate your Exchange server for the required prerequisites, if everything already in-place then, you will be all good to go forward.
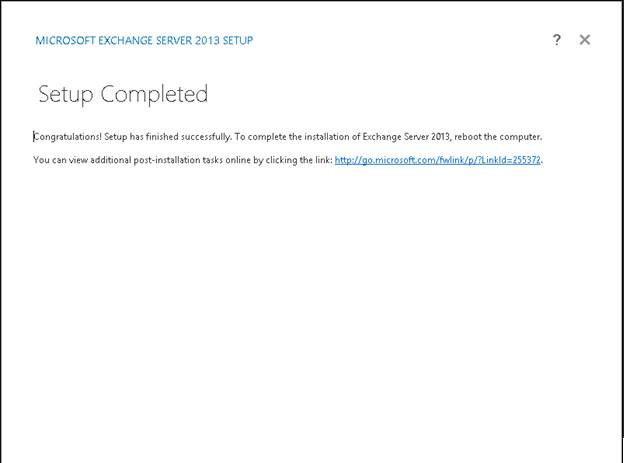
- b. Installing Exchange 2013 binaries, it will take some time to install your Exchange 2013 mailbox server, and once the installation will be finished, setup will notify you about the successful installation completed.
Installing First Exchange 2013 Server Client Access Server (CAS)
In case if you are installing Exchange 2013 CAS Server sepeately than you Exchange 2013 Mailbox Server role, then you can follow the same above procedure for installing the Exchange Server 2013 CAS server role in the above example.
Managing Exchange 2013 Messaging Organization with Exchange Administrator Center (EAC)
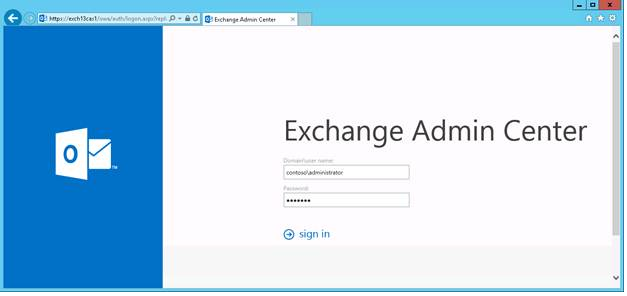
Unlike Exchange 2010, Exchange 2013 doesn’t have Exchange Management Console (EMC), and it provides one new and one older method of managing your Exchange 2013 instance. Exchange 2013 introduces Exchange Administration Center (EAC), which is a web-based management engine for your Exchange 2013 CAS and Mailbox servers, and alongside to EAC, Exchange also supports the old method of managing Exchange Server with Windows PowerShell.
Since we have installed our Exchange 2013 boxes in the above step, we can now browse the Exchange Administration Center web-management interface using the this URL: https://Exch13CASFQDN/ecp
Conclusion
In this article, first we shared the links to few of the Exchange 2013 videos from Microsoft TechEd Australia 2013 for Exchange 2013 Architectural changes and High Availability discussion. After this we discussed the software, virtualization, and hardware requirements for Exchange Server 2013 installation. And at last we looked at the step by step installation for Exchange Server 2013 on a Windows Server 2012 machine.
In the next blog post series of Exchange Server 2013, we will discuss about “Part II: Managing and Configuring Recipients, Mail Flow, and Exchange RBAC for Delegation of Authority”. For seeing the up-coming parts of this blog post, please stay tunued.
Cheers

Leave a comment